RailsのActiveMailerにおけるメールの送受信
様々な情報を参考に作成しております
バージョン
Ruby 2.6.5
Rails 6.0.3.5
概要
お問い合わせページからの送信がDBを経て自分のメールボックスへメールを届ける受信と
会員登録などが完了後自動的に送られるメールの実装について
受信処理
・contactモデルの作成
まずはコンタクトモデルの作成から、カラムはstring型のnameとtext型のmessageというカラム
rails g model contact name:string message:text
から
rails db:migrate
・ルーティングの設定
ルーティングにcontact関連の記入を追加
項目はnewとcreate
post "contacts/create", to: "contacts#create"
get "contacts/new", to: "contacts#new"
・contactコントローラーの作成
ターミナル
rails g controller contacts
作成したcontacts_controller.rbに記入
class ContactsController < ApplicationController
def new
@contact = Contact.new
end
def create
@contact = Contact.new(contact_params)
if @contact.save
ContactMailer.contact_mail(@contact).deliver
redirect_to root_path
else
redirect_to root_path
end
end
private
def contact_params
params.require(:contact).permit(:name,:message)
end
end
お問い合わせがDBに保存された際に
ContactMailer.contact_mail(@contact).deliver
の処理をし、メール送信の処理をする。詳細は以下に記載
・お問い合わせページのビューの作成
app/views/contacts/new.html.erb
<h2>お問い合わせフォーム</h2>
<%= form_with(model:@contact,url: contacts_create_path, local: true) do |f| %>
<%= f.label :お名前%><br>
<%= f.text_field :name, class:"input-default",placeholder:"お名前をご記入下さい" %><br>
<%= f.label :お問い合わせ内容%><br>
<%= f.text_area :message,class:"input-default-area-contact",placeholder:"お問い合わせ内容をご記入下さい"%><br>
<%= f.submit "送信"%>
<% end %>
・メーラークラスの作成
コマンドを実行し、メーラークラスを作成
rails g mailer contact
生成された中のcontact_mailer.rbに必要事項を記入
app/mailers/contact_mailer.rb
class ContactMailer < ApplicationMailer
def contact_mail(contact)
@contact = contact
end
end
toはお問い合わせ内容の宛先、subjectはタイトルを表している
・メールサーバーの設定
今回はGmailにてサーバーを設定
メール関連の記載がある箇所に追記
config/enviroments/development.rb
config.action_mailer.raise_delivery_errors = true
#メールが送信できなかったらエラーを発生させる
config.action_mailer.perform_deliveries = true
#メールが送信を有効にする
config.action_mailer.perform_caching = true
#メールテンプレートのキャッシングを有効にする
port: 587,
authentication: 'plain',
enable_starttls_auto: true
}
user_nameは自身のアドレスを環境変数にて設定
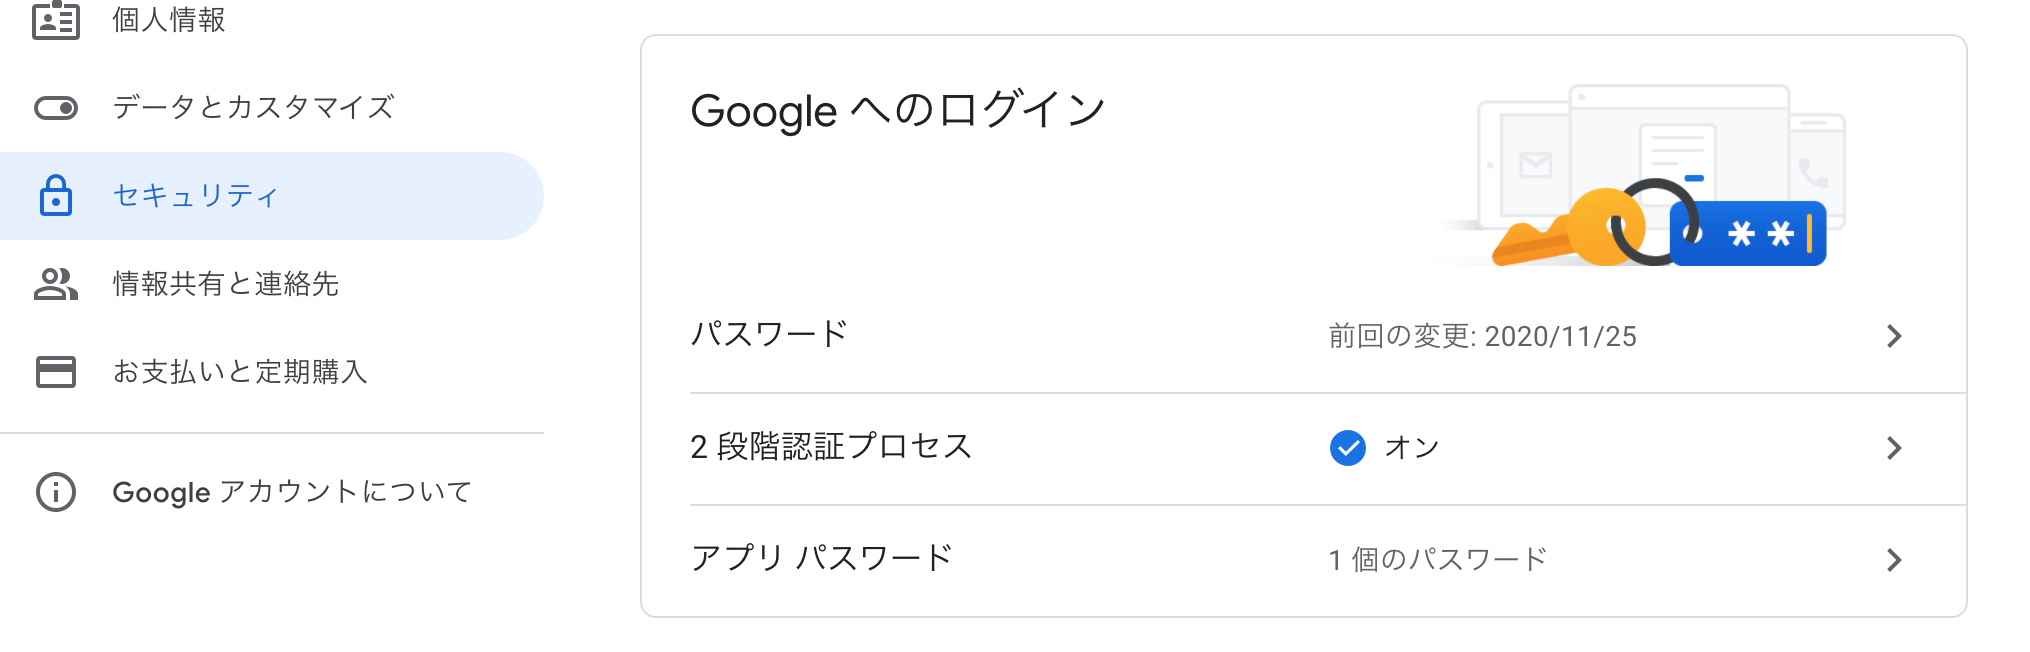
passwordについてはアプリパスワードを設定
自身のグーグルアカウント設定⇨セキュリティ ⇨Googleへのログインを設定
まずは2段階認証を設定してからアプリパスワードを設定する
・メールテンプレートの作成
シンプルに下記の通り作成
app/views/contact_mailer/contact_mail.html.erb
<%= @contact.name%>様から問い合わせがありました。
・お問い合わせ内容
<%= @contact.message %>
・メール送信テスト
この状況でメールの送信ができるか確認する。
環境設定を忘れずに
送信処理
まずはmailに関する共通処理として前述のメールサーバーの設定ができていればOK
・送信用のメーラー作成
ターミナルにて
rails g mailer NotificationMailer
にて作成
・メール送信処理の作成
先ほどのメーラーにて作成
app/mailers/notification_mailer.rb
class NotificationMailer < ApplicationMailer
def send_confirm_to_user(user)
@user = user
mail(
subject: "会員登録が完了しました。",
to: @user.email
) do |format|
format.text
end
end
end
・メール本文の作成
app/views/notification_mailer/send_confirm_to_user.text.erb
<%= @user.nickname %> 様
●●への会員登録が完了しました。
・会員登録の際、メール処理の記入
createコントローラーに処理を記載
app/controllers/users_controller.rb
def create
if @user.save
NotificationMailer.send_confirm_to_user(@user).deliver
else
render :new
end
end
こちらで送信受信の処理をしました。